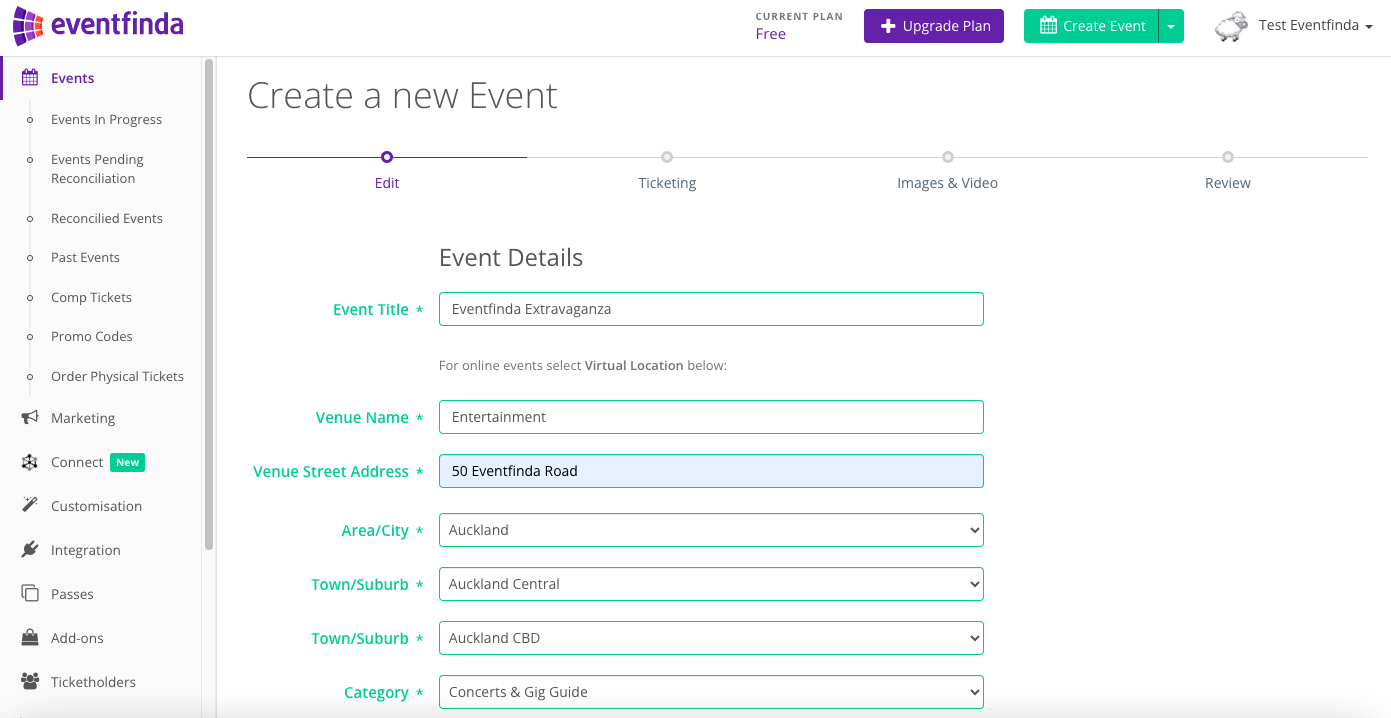
Create an event and set up your ticketing with Eventfinda by following our how-to guide.
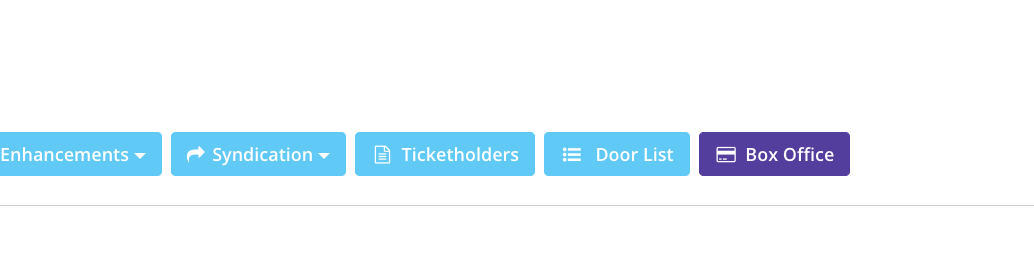
If you need staff to scan at the event, click the Door List button under the event then click Manage Door List Recipients.
Enter the email addresses for any door list staff you wish to have access to event data for scanning tickets using the Scan Tickets app. They will each need to create an Eventfinda account to be able to log into the app.
Download the Scan Tickets app to your phone. You can do this by searching “Eventfinda” or following one of the links below:
Once downloaded, select your country and login with your Eventfinda Promoter Portal account or through Facebook.
*Please note that the app is only available in the App Store set for the countries New Zealand and Australia

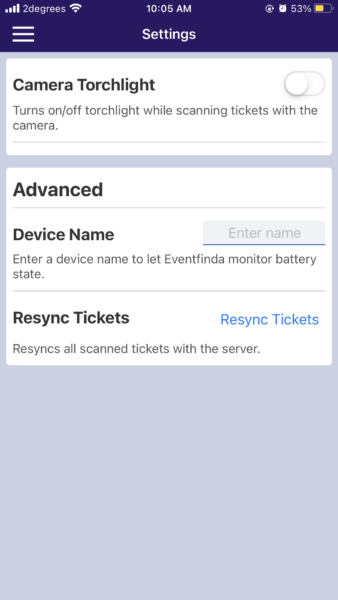
Click the 3 lines in the top corner of the screen with all the listed events and select Settings.
To ensure the app is up to date, it's important to resync the tickets before you start. Click Resync Tickets.
To be able to resync the tickets, you'll need to have the device connected to the internet.
If you need light, turn on the Camera Torchlight to use your smartphone's torch for scanning in low light conditions. The torch on the device will only be active when in scanning mode in order to save battery power.
When the phone is not in silent mode, there are sounds when a ticket is valid or invalid. This can increase or decrease in sound with your volume button.
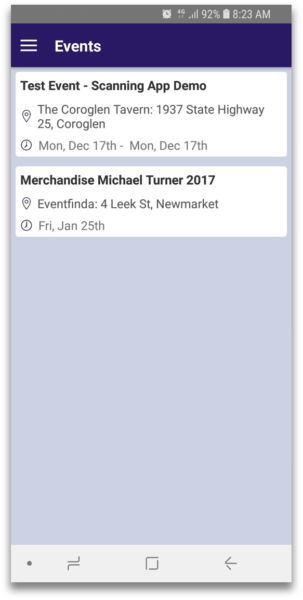
The app will open to an Events page listing your current events, shows, or screenings.
Please note your event will be automatically loaded onto the app 2 days prior to the first session until 5 days after the last session.
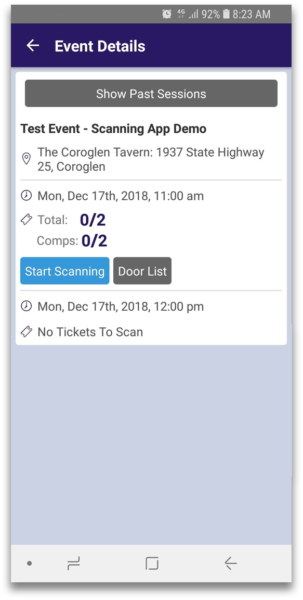
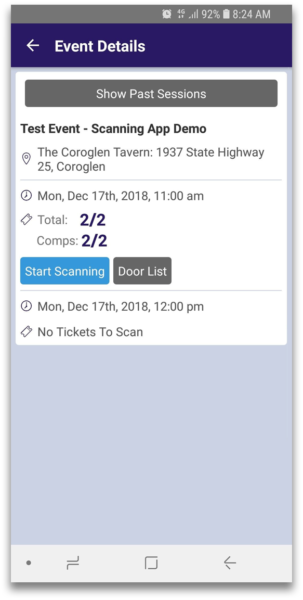
You will now be taken to a summary screen displaying the total tickets sold and the total number of tickets scanned in.
This will help you keep track of your audience numbers, how many more you can expect to arrive, how many are already in the venue, and how many purchased a ticket but didn’t arrive.
From this screen, click the Start Scanning button at the bottom of the screen.
The scanning camera will open, allowing you to scan QR codes on printed and digital tickets.
Hover the camera over the QR code and wait for a green tick to appear.
This will let you know the ticket has scanned and you can allow the ticketholder through to the event.
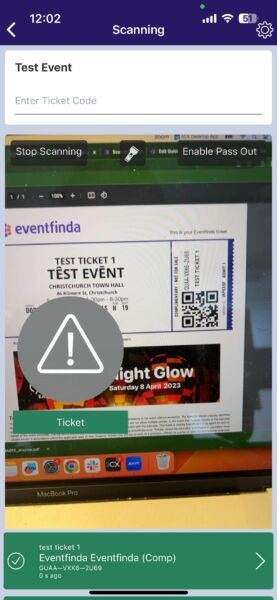
At the bottom of the screen, you will see the results of your last scanned ticket. Clicking the panel will open the scan results. Green is a valid ticket.

If for some reason, the ticket is not scanning correctly there are a few things you can try. You will know the ticket is not scanning when it displays ‘invalid ticket’ in red instead of the green tick.
What to do when tickets are still not scanning:
Firstly check the details on the ticket state the correct date and session name. Tickets will be invalid if the app is attempting to scan for a comedy night on Thursday and a ticketholder’s ticket is for Friday for example.
Once you’ve been able to confirm the ticket is for the correct show and session, you can first ask the audience member to turn the brightness up on their phone. Sometimes this helps the scanner read the code.
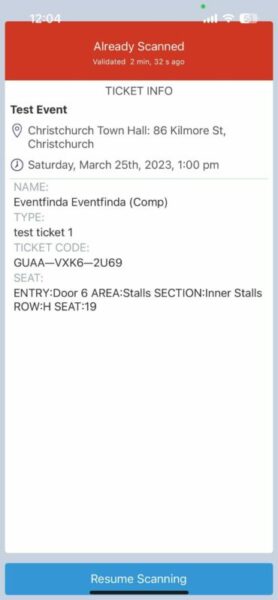
If it says 'already scanned', check the time that it was validated. Sometimes the scanner is quick to pick up the code that it's been scanned a few seconds ago. If it says 'already scanned' from earlier than that, you may need to inquire with the customer what happened.
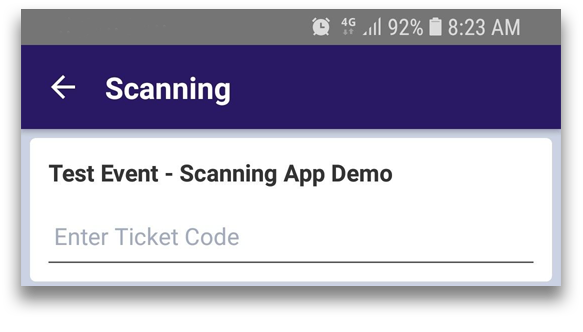
If the ticket isn't scanning, you can enter the ticket code in the field below your event name.
Select the ticket you want to validate manually and click Apply at the bottom of the screen.
You can see which tickets have been validated (passed in) and which are yet to be validated.
If the customer cannot find their ticket, you can look up their name when you go back out of the camera and click Door List.
You can search their name, tap it to select and click Apply. This will pass them in.

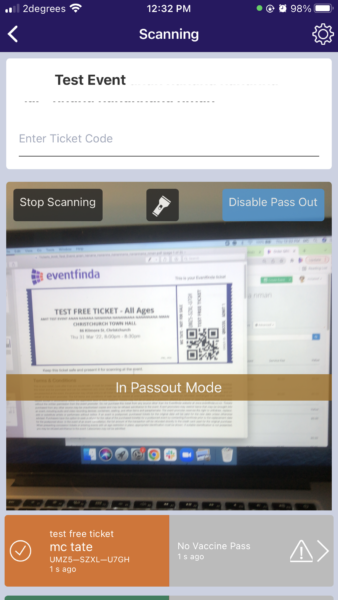
If ticketholders will be leaving the event and returning, you can enable pass-out mode to scan them out. This will deactivate their ticket so it can scan in again.
To turn on pass out mode, click Enable Pass Out. To turn off, click disable.
From the door list, select a passed in ticket and click Apply at the bottom of the screen to pass out that ticket
The list will then display which tickets have been passed out.
Review the number of tickets scanned and how many ticketholders still to enter.
This screen shows that 2 tickets have been scanned from a total of 2 tickets issued. It also displays that both tickets were complimentary.
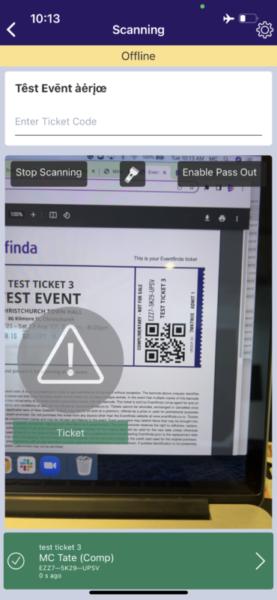
If a network connection is not present the app will display "Offline" in a strip at the top of the screen. The app will still be able to scan tickets that have already been downloaded and stored on the device.
The database of tickets issued is stored on the device. Note this means that any new tickets issued after the device goes into offline mode will not be stored on the device and will return invalid if those tickets are scanned.
When the device reconnects to the network the Offline strip at the top of the screen will disappear.
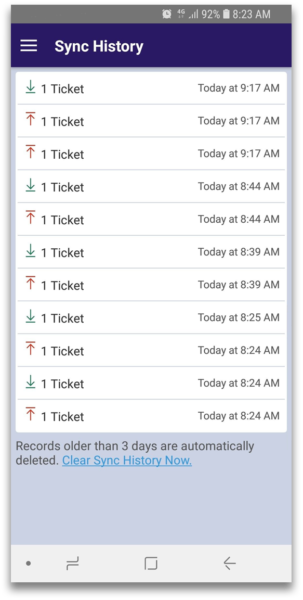
To view the last time the device synced back to the live database, select the Menu icon at the top left of the screen, then Select Sync History.
The list will display the sync history for tickets data received (green down arrow) and validation data sent (red up arrow).
Syncing up means that other devices will then be able to receive the validation history across all devices so a ticket already scanned at one gate will return invalid if presented at another gate.
When scanning tickets have finished using the device, use the menu to log out to ensure data security, so no-one can manually scan tickets back out and be reused for example.